Android SDK Installation
To use it, users need to do the following.
Vietbando Android SDK is a vector map library for Android. This tutorial will guide you to install Vietbando Android SDK with Android Studio, load a map, add marker, and change the map type.
Note! We are still actively developing the Vietbando Android SDK and will update this guide and new tutorials when it improves its great features.
Install Android Studio
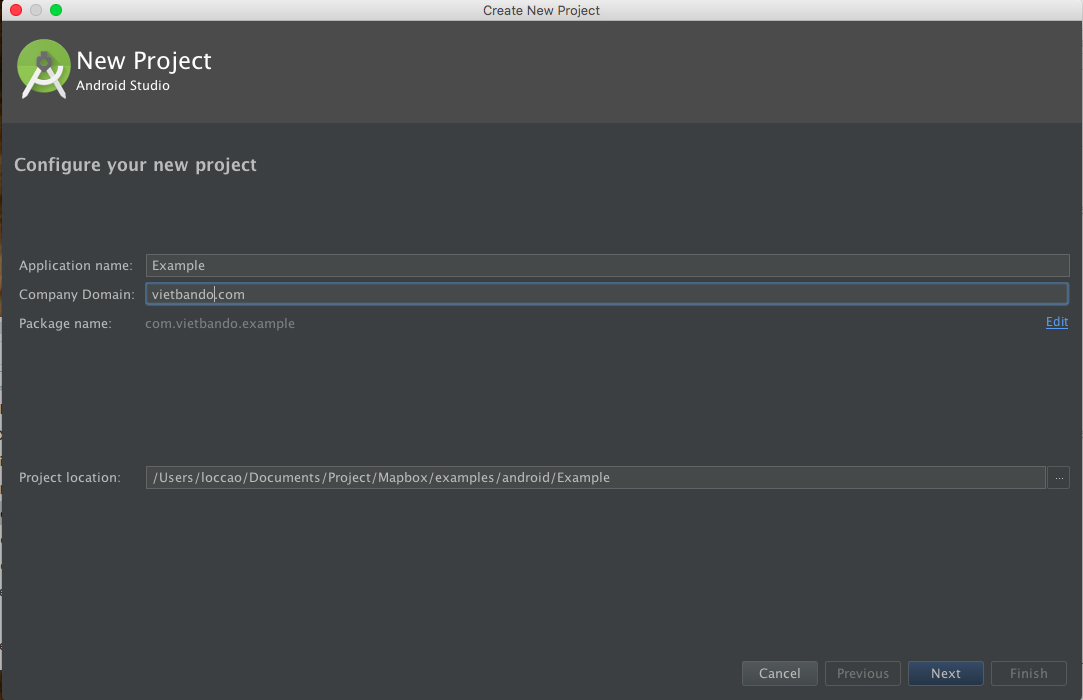
Open Android Studio and select File ‣ New ‣ New Project to create a new project (hoặc select Start a new Android Studio project). In Configure your new project:
- Name the project is
Example - The domain is
vietbando.com
In Select the form factors your app will run on, select “Phone and Tablet”. For a minimalist SDK, select API 15: Android 4.0.3 (IceCreamSandwich). This is the lowest API level currently supported by Vietbando Android SDK.

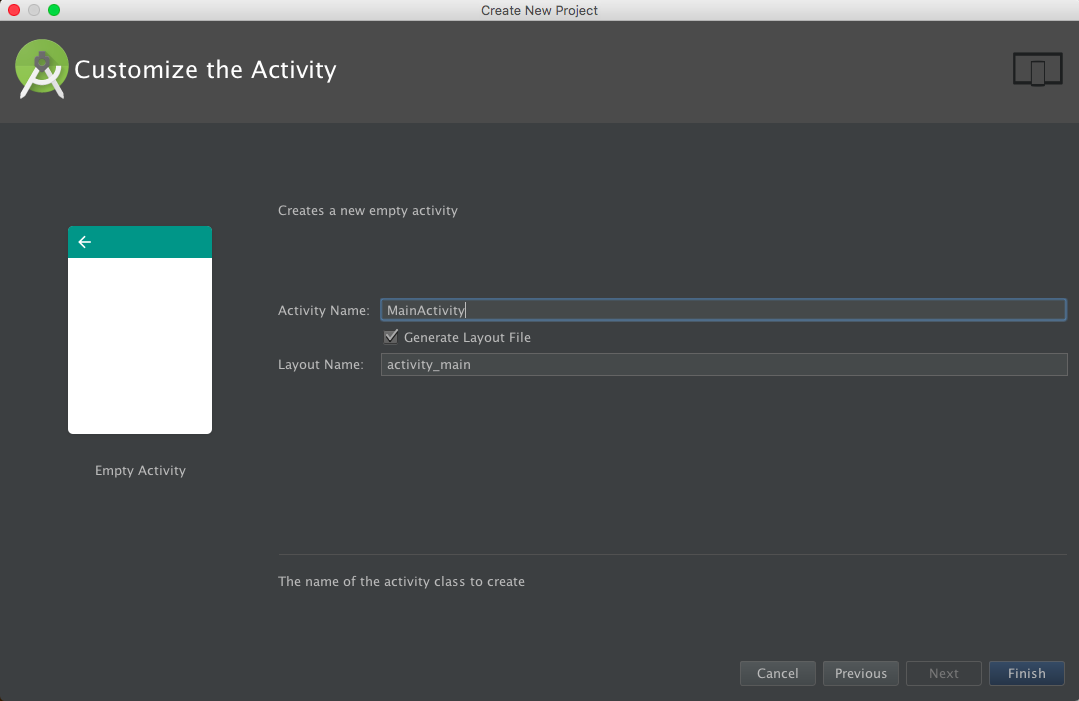
Click Next to go to Activity screen. Select Empty Activity and click Next. Accept the default Activity Name and Layout Name and select Finish.
Install Android Virtual Device
Android Studio can help you set up virtual Android devices on your computer to test your apps while you are developing. To set up a device, you select the Android Virtual Device
(AVD) Manager icon  , and select Create Virtual Device . In Phones category, select Nexus 5 and click Next. Select the version you want to test (this guide was developed by Lollipop API level 23, x86,
Android 6.0). Learn more about how to set up AVD from Android Studio’s documentation.
, and select Create Virtual Device . In Phones category, select Nexus 5 and click Next. Select the version you want to test (this guide was developed by Lollipop API level 23, x86,
Android 6.0). Learn more about how to set up AVD from Android Studio’s documentation.
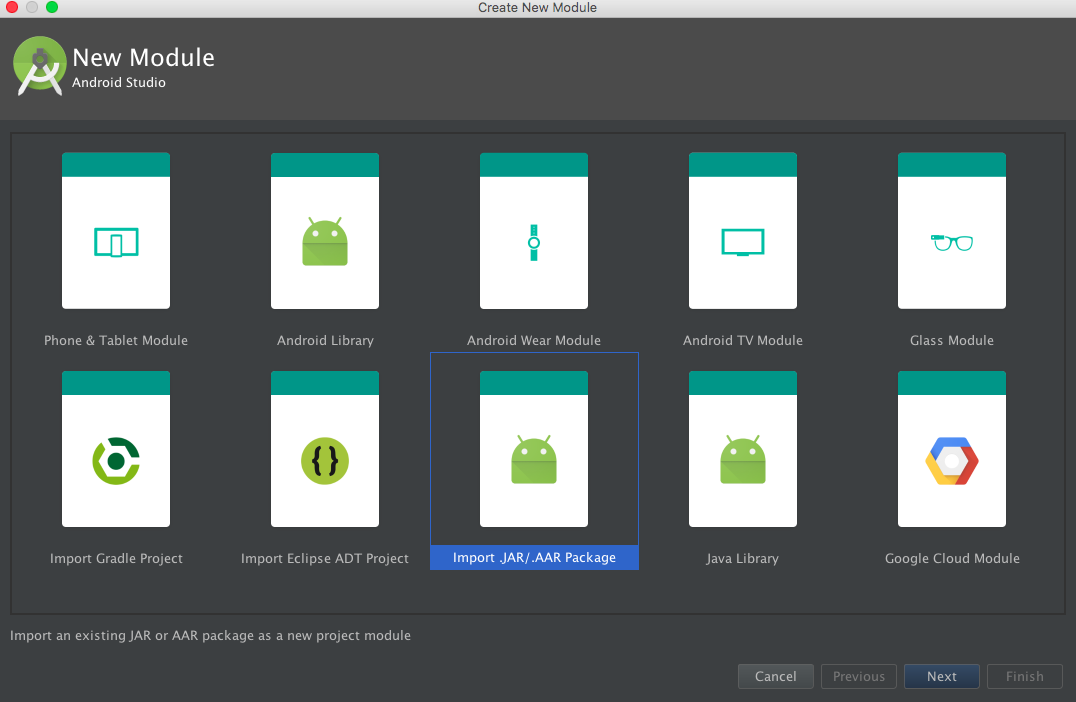
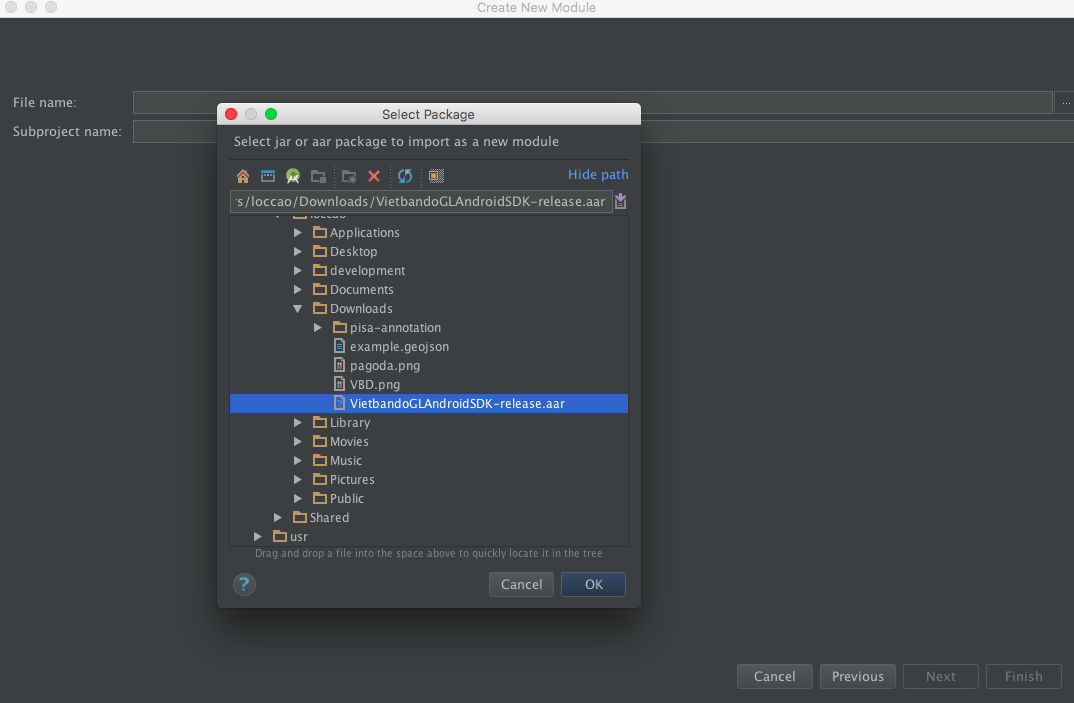
Install Vietbando
Download Vietbando SDK here. The interface for setting up the library will be in the following order:
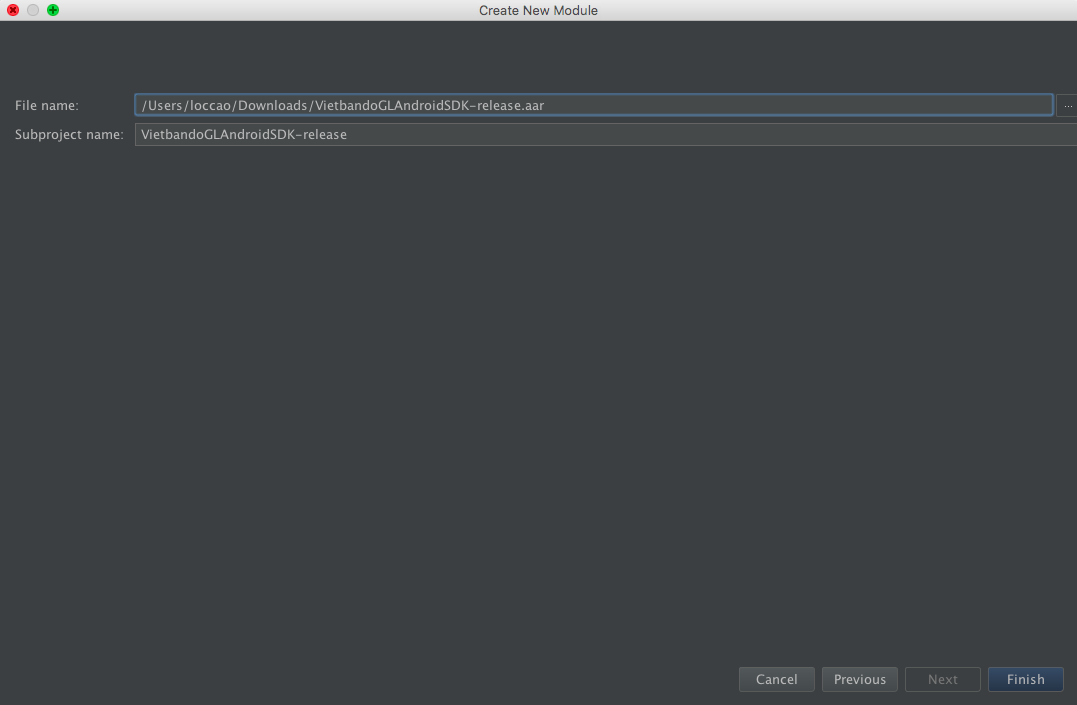
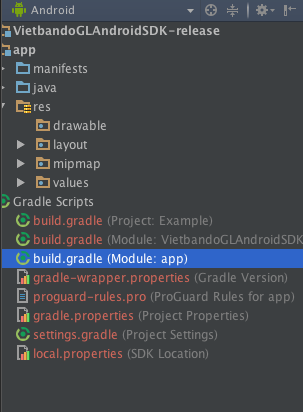
To use the Android SDK, add Module Build File <PROJECT_ROOT>\app\build.gradle to:
repositories {
    mavenCentral()
}

dependencies {
    implementation fileTree(dir: 'libs', include: ['*.jar'])

    implementation 'com.android.support:multidex:1.0.3'
    implementation 'androidx.appcompat:appcompat:1.5.1'

    // add the vietbando SDK dependency below
    implementation project(':VietbandoGLAndroidSDK-release')

    implementation 'com.jakewharton.timber:timber:4.7.1'
   	implementation'com.squareup.okhttp3:okhttp:4.9.1'
    implementation'com.google.code.gson:gson:2.8.9'
}
Grant application permissions
Ensure the following core permissions are required in the AndroidManifest.xml file from the ~/Example/app/src/main/ project:
<uses-permission android:name="android.permission.ACCESS_NETWORK_STATE" />
<uses-permission android:name="android.permission.INTERNET" />
<uses-permission android:name="android.permission.ACCESS_COARSE_LOCATION" />
<uses-permission android:name="android.permission.ACCESS_FINE_LOCATION" />
Access tokens
An authentication key is required to use the service and the Vietbando API, such as maps, directions, geocodes. Your authentication keys can be managed in your account settings where you can get current key and create new one. You should create a new key for each of your applications, help you monitor usage and minimize interruptions in case a token must be revoked.
First, go to your account settings and create a new authentication key for Example.
See detailed instructions for register an authentication key here.
Once you have the key, openstrings.xml file from ~/Example/app/src/main/res/values.
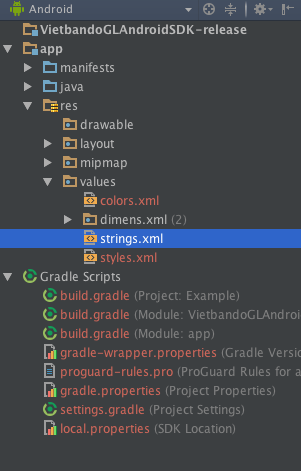
Add a new string for your access token:
<resources>
    <string name="app_name">Example</string>
    <string name="accessToken">Your authentication key</string>
</resources>
Create App.java
Create App.java extend Application class. In the onCreate() function, add line Vietbando.getInstance(getApplicationContext(),getString(R.string.access_token));
    package com.vbd.example.mapsdkexample;


    import androidx.multidex.MultiDex;
    import androidx.multidex.MultiDexApplication;

    import com.vietbando.vietbandosdk.Vietbando;

    public class App extends MultiDexApplication {

        @Override
        public void onCreate() {
            super.onCreate();
            MultiDex.install(this);
            Vietbando.getInstance(getApplicationContext(), getString(R.string.access_token));
        }

    }
App.java file must have this line in the AndroidManifest.xml:
<application android:name=".App"...>...</application>
MapView
MapView class is the main component of the library. It works just like other views and its behavior can be changed statically with a XML layout file, or programmed at runtime.
To add the MapView as a layout element, replace the code in activity_main.xml file in ~/Example/app/src/main/res/layout/ with the following code:
<?xml version="1.0" encoding="utf-8"?>
<RelativeLayout xmlns:android="http://schemas.android.com/apk/res/android"
    xmlns:tools="http://schemas.android.com/tools"
    xmlns:vietbando="http://schemas.android.com/apk/res-auto"
    android:layout_width="match_parent"
    android:layout_height="match_parent"
    tools:context=".MainActivity">

    <com.vietbando.vietbandosdk.maps.MapView
        android:id="@+id/mapview"
        android:layout_width="fill_parent"
        android:layout_height="fill_parent"
        vietbando:access_token="@string/accessToken"/>
        <!-- note the access token string created in the previous step -->
</RelativeLayout>
Then, you can call MapView class programmed inside Activity:
findViewById(R.id.mapview);Add a map
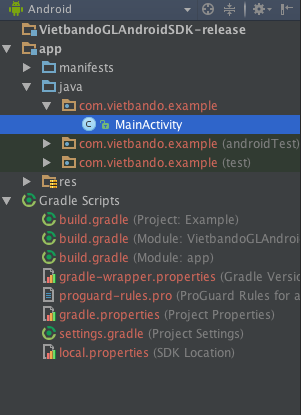
In Android Studio, go to ~/app/src/main/java/com.vietbando.Example/MainActivity.java.
We will use mapView that we set up earlier to add Vietbando map to our application. The application needs to know when to add the map, such as when the activity is initialized with onCreate.
private MapView mapView;

    @Override
    protected void onCreate(Bundle savedInstanceState) {
        super.onCreate(savedInstanceState);
        setContentView(R.layout.activity_main);

        // Create a mapView
        mapView = (MapView) findViewById(R.id.mapview);
        mapView.onCreate(savedInstanceState);
    }
Next, use your new mapView class to create a vietbandoMap object. vietbandoMap has a lot of methods that will allow you to apply styles, change camera position, add markers, and more. Create your vietbandoMap:
mapView.getMapAsync(new OnMapReadyCallback() {
    @Override
    public void onMapReady(vietbandoMap vietbandoMap) {
    // Customize map with markers, polylines, etc.
    }
});
Configure your MapView
Starting with version 4.0.0 of Vietbando Android SDK, you can configure many characteristics of your map, including camera start position, URL style, and authentication key in your layout file. Add the following code to your layout file, inside com.vietbando.vietbandosdk.maps.MapView tag:
vietbando:center_latitude="10.7773973"
vietbando:center_longitude="106.701278"
vietbando:zoom="12"
vietbando:tilt="20"
Once you've finished entering the code above, you may see some red alert text from Android Studio. This is because we have not imported some of the classes referenced in MainActivity.java. You can automatically enter these classes by pressing Alt + Enter (option + return on Mac). Also, add the following line to the header of MainActivity.java:
import android.app.Activity;
import android.os.Bundle;

import com.vietbando.vietbandosdk.camera.CameraPosition;
import com.vietbando.vietbandosdk.constants.Style;
import com.vietbando.vietbandosdk.geometry.LatLng;
import com.vietbando.vietbandosdk.camera.CameraUpdateFactory;
import com.vietbando.vietbandosdk.maps.MapView;
import com.vietbando.vietbandosdk.maps.VietbandoMap;
import com.vietbando.vietbandosdk.maps.OnMapReadyCallback;
Next, we will handle other types of events that may affect our mapping application:
@Override
public void onResume() {
super.onResume();
mapView.onResume();
}
@Override
public void onPause() {
super.onPause();
mapView.onPause();
}
@Override
public void onSaveInstanceState(Bundle outState) {
super.onSaveInstanceState(outState);
mapView.onSaveInstanceState(outState);
}
@Override
public void onLowMemory() {
super.onLowMemory();
mapView.onLowMemory();
}
@Override
protected void onDestroy() {
super.onDestroy();
mapView.onDestroy();
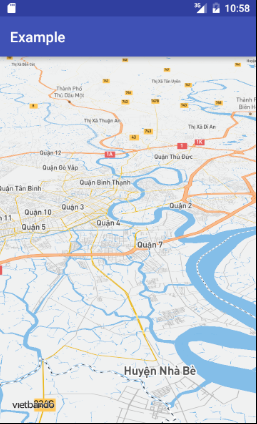
}Click Run ‘app’  to build app. Android Studio will take a few seconds to build if it finishes without error,
you will be able to test it in the AVD you set up earlier.
to build app. Android Studio will take a few seconds to build if it finishes without error,
you will be able to test it in the AVD you set up earlier.
Change the map style
Vietbando Android SDKs comes with a number of map types, so try changing it a bit.
Hint: Try typing vietbandoMap.setStyleUrl(Style. and Android Studio will give you a list of styles available to choose.
In onCreate(), change to assign vietbandoMapstyle to:
vietbandoMap.setStyleUrl(Style.VIETBANDO_RA_TERRAIN);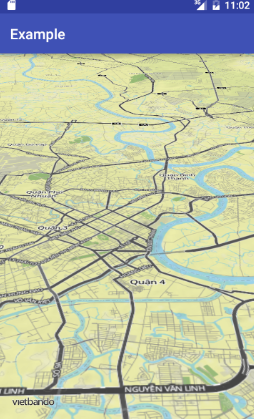
Sample project
Download sample project here. You need to replace your access token as instructed in section Access tokens.